Divide to make healthier plants–and more of them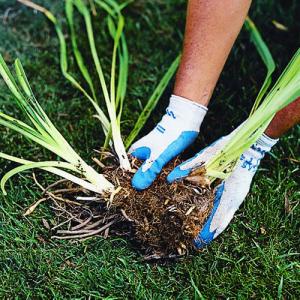 by Janet Macunovich
When dividing perennials, timing and technique are important. Perennial plants are healthiest and most productive when they are young and have room to spread. How wonderful that we can rejuvenate even the oldest residents of a garden by occasionally dividing them. Read on to learn how to divide plants.
1. Divide when a plant looks good
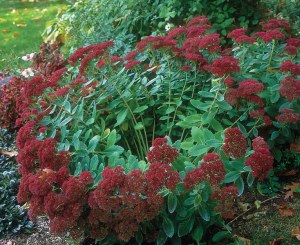
Don’t wait until a plant has become decrepit or monstrous to divide it. My rule of thumb is when it looks its best, divide it at the end of that year. Watch for the early signs of trouble: when the center of the plant has smaller leaves, fewer flowers, and weaker blooming stalks than the outer edges like this Sedum ‘Autumn Joy’, or when the plant runs out of growing room on its edges and has nowhere to go but into neighboring plants.
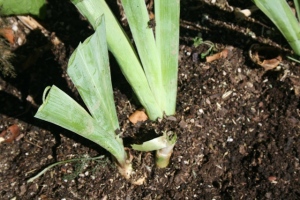
2. Start at the drip line
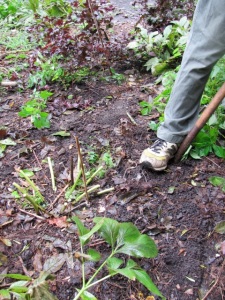 To lift a perennial with minimal root damage, begin digging at its drip line. The roots will generally extend that far, so digging there lets you lift the plant with most of its roots intact. Dig a trench around the clump, cleanly severing any roots, then cut at an angle down and under the clump from various points around the outer edge until you can lever the plant out of the hole. For large, heavy plants, you may have to first dig the trench, then slice straight down through the center of the plant as if it was a pie, halving or quartering the clump before undercutting and lifting it.
In early spring, I divide while the new growth is still low to the ground, so the handling of stems is not usually an issue. In summer, I might tie stems together before lifting the plant to avoid damaging them during the digging. In fall, I usually cut plants back before digging them for division.
3. Divide in cool weather
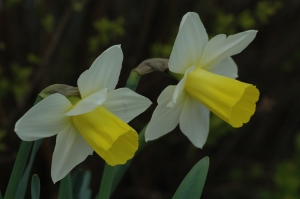
Perennials can be divided at any time of the year if you give the plant appropriate care afterward, and I do just that. But for the best return on my time and the quickest reestablishment of the perennials, I divide when the soil is warmer than the air for at least part of every 24-hour period. That’s just before peak daffodil season in spring and in early fall right after the nights become cool. These conditions will allow the roots of the division to grow while the tops stay low, out of the sun and wind.
I prefer to divide in the fall rather than in the spring because the plants have more time to set new roots before growing up into the heat. I will divide fall bloomers in September if it’s expedient, but I usually leave them to bloom undisturbed and divide them in the spring.
4. Keep roots cool and moist
Fifty percent humidity and 50°F are the ideal conditions for holding divisions until you can get them back into the ground. Put them into a bucket or box in a cool shaded place, such as a garage, and cover them with newspaper to retard moisture loss. Sprinkle water to dampen the newspaper if the roots seem to be drying during their “hold” time. If, despite your best efforts, the divisions dry out while on hold, don’t despair. Soak them in a bucket of water for about an hour before replanting.
5. Replenish soil with organic matter
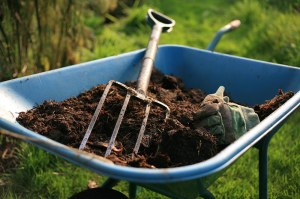 If you remove a wheelbarrow full of perennials, then you should put a wheelbarrow full of compost back into that site before replanting to renew the soil, stay ahead of pest problems, and maintain fertility. Without additions, the plants will not have the advantage of renewed, fertile soil and the bed will settle after planting, putting the plants at a disadvantage in terms of drainage and air circulation.
6. Use vigorous sections first
 After dividing, replant pieces that are, at most, 20 to 25 percent of the original clump. Smaller sections grow more vigorously and tend to produce stronger, longer-lasting blooms. Dividing a hosta, for example, into pieces with about seven growing points will yield the best results. Perennials multiply exponentially—one stem is likely to triple or quadruple itself each year. So if all you do is halve an overgrown clump this year, it will more than double in a season and need dividing again the next year.
7. Take extra care when a plant’s in bloom
 Although I have often read that I shouldn’t, I sometimes divide plants when they’re blooming. I understand, however, that plants in bloom may not be capable of growing as many new roots as quickly as nonblooming plants. I’ve done this in September when Japanese anemones (Anemone × hybrida cvs.) and asters (Aster spp. and cvs.) are in bloom and in April when the pasque flower (Pulsatilla vulgaris) and lungworts (Pulmonaria spp. and cvs.) are at their peak. I haven’t lost any divisions yet. I have also divided late-spring and summer bloomers while they were flowering. Given the extra care that common sense dictates (such as more attentive watering or shade at midday), these plants will fare well, too.
8. Keep only the healthiest pieces
If you wait until a perennial is declining, has a dead center, or has succumbed to pest problems because it has become crowded and weak, be sure to replant only the healthiest pieces. Usually these are the outside sections. Watch for discolored stems and eroded crowns and roots.
Look for signs of poor health. A cut peony stem shows a symptom of disease, and replanting as is will ensure that all new shoots and buds will be exposed to that same infection.
9. Spread out your divisions
 Place a division into a hole that is at least as wide as its roots when spread out. Don’t turn a root tip up rather than down or curl it back around on itself to fit it into an undersize hole because you’ll defeat the plant’s natural regrowth mechanisms.
Root tip growth is regulated in part by chemicals flowing down from the tips of leafy stems to the roots. As in all flows, gravity is involved, so if you plant a root tip up when it was down, the normal flow is interrupted. At least temporarily, that root tip will not grow as vigorously as it could.
Replant divisions in a wide hole and over a wide area. Spread out the roots wide and down over a mound of soil.
In the next growing season, the top of the plant will be as wide as the roots are at the time of planting. Ensure that when you spread out the roots they don’t overlap and compete with the other divisions.
10. Let the roots be your guide
When you dig up a perennial, you will see that it fits into one of five basic root types: roots that form clumps or offsets, surface roots, underground running roots, taproots, or woody roots. How you proceed depends on what root type your plant has.
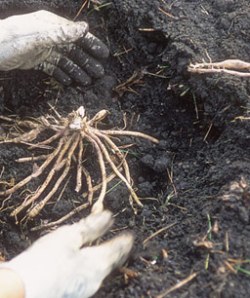
Offsets
To divide a plant whose roots form offsets (small plants growing at the base of a larger one), snap the connection between any of the sections to obtain a piece with ample roots and three or more growing points (or “eyes”). Some denser clumps may have to be cut apart.
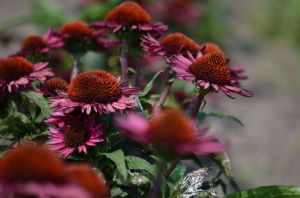
Plants that form offsets include asters (Aster spp. and cvs., USDA Hardiness Zones 4–8), coneflowers (Echinacea purpurea and cvs., Z 3–9), hostas (Hosta spp. and cvs., Z 3–8), tickseeds (Coreopsis spp. and cvs., Z 4–9).
Surface roots
Some perennials have roots that run on or just below the surface of the soil. They form new crowns and roots when they reach open spaces or make contact with the soil. If you cut between any of the stems as you would cut a piece of sod from a lawn, you will have a division with its own stems and roots.
Plants with surface roots include bee balms (Monarda spp. and cvs., Z 4–9), black-eyed Susans (Rudbeckia spp. and cvs., Z 3–9), creeping sedums (Sedum spp. and cvs., Z 3–9), creeping speedwells (Veronica spp. and cvs., Z 3–8).
Taproots
Plants that have taproots can be divided by using a sharp knife to slice down the length of the root. Every piece that has at least one eye, some of the taproot, and a few side roots is a viable division.
Plants that have taproots include balloon flowers (Platycodon grandiflorus and cvs., Z 4–9), butterfly weeds (Asclepias tuberosa and cvs., Z 4–9), cushion spurges (Euphorbia polychroma and cvs., Z 4–9), Oriental poppies (Papaver orientale and cvs., Z 4–9).
Underground running roots
Underground running roots can develop suckers as they grow beyond the shade of the mother clump. These suckers can be cut away from the main plant, or you can dig up the main plant and cut away any piece with an eye or sucker already forming.
Plants with underground running roots include hardy geraniums (Geranium spp. and cvs., Z 4–9), Japanese anemones (Anemone × hybrida cvs., Z 4–8), ostrich fern (Matteuccia pennsylvanica, Z 3–8), plume poppies (Macleaya spp. and cvs., Z 4–9).
Woody roots
Woody perennials often form roots when stems rest on the ground or are buried by gradually accumulating mulch. Make a new plant by simply cutting between the rooted stem and the mother plant.
Plants that have woody roots include candytufts (Iberis spp. and cvs., Z 5–9), euonymus (Euonymus spp. and cvs., Z 4–9), lavenders (Lavandula spp. and cvs., Z 5–10), sages (Salvia spp. and cvs., Z 5–10).


 Most of us have heard of mole control, but not vole control. Why? Well, the latter gets little recognition but may be making his presence known in your gardens now.


